

Embroidery machines are precise, but they can’t directly read regular image files like JPG or PNG. That’s why JPG to JAN embroidery conversion is essential if you’re working with Janome machines. A simple logo or artwork saved as a JPG won’t mean much to your embroidery machine until it’s converted into a machine-readable format like JAN. This process ensures your design stitches out cleanly, with accurate details and proper thread paths, saving you time and frustration.
What is JAN Format?
The JAN format is specific to Janome embroidery machines. Unlike common graphic formats such as JPG or PNG, JAN files contain stitch data instead of pixels. Every stitch, angle, density, and underlay is embedded in the file, giving the machine a clear blueprint to follow. This makes JAN files reliable for precise embroidery, whether it’s a simple monogram or a complex multi-colored logo.
Why Not Just Use JPG Files?
You might wonder: why can’t Janome machines simply read JPGs? The reason is simple—JPGs are made of pixels, not stitches. An embroidery machine doesn’t interpret images; it follows stitch commands. That’s why JPG to JAN embroidery conversion is more than just changing the file extension. It involves professional digitizing, where each detail of the artwork is translated into a stitch pattern.
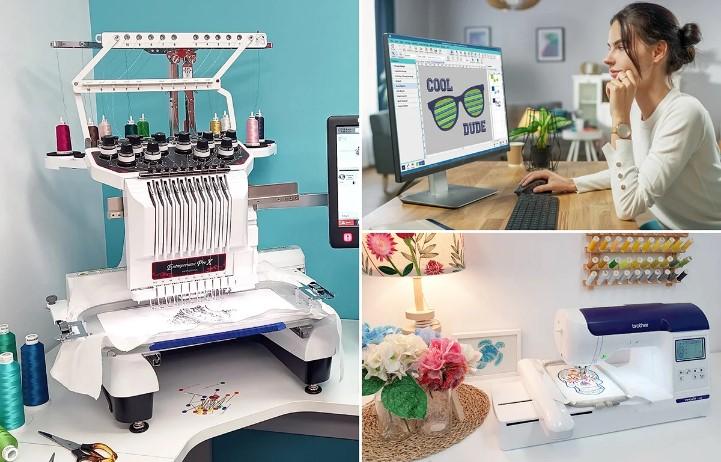
The Conversion Process Explained
Turning a JPG into a JAN file is not a one-click job. Here’s how the process usually works:
- Importing the JPG – The design or logo is loaded into embroidery digitizing software.
- Tracing the Artwork – Key shapes and outlines are mapped.
- Stitch Assignment – Stitches (satin, fill, running) are chosen based on design areas.
- Density & Underlay Setup – Adjustments are made depending on fabric type.
- Pathing Optimization – Stitch order is arranged to minimize trims and thread breaks.
- Export to JAN – Finally, the file is saved in JAN format for Janome machines.
- Test Run – A sample embroidery is often stitched to check quality.
This careful process ensures the file works smoothly on the machine while producing crisp, professional embroidery.
Benefits of Converting JPG to JAN
Using properly digitized JAN files offers multiple benefits:
- Professional Stitch Quality – Designs come out sharp and detailed.
- Machine Compatibility – JAN files run smoothly on Janome machines without errors.
- Reduced Thread Breaks – Optimized pathing reduces unnecessary stops and trims.
- Scalability – Properly digitized files can be resized without losing stitch accuracy.
- Time Efficiency – A ready-to-stitch file saves hours of trial and error.
Common Challenges Without Proper Conversion
Skipping professional conversion can lead to a variety of embroidery headaches:
- Jagged Edges – Designs look pixelated instead of smooth.
- Unreadable Text – Small fonts turn into blobs of thread.
- Fabric Distortion – Poor density settings cause puckering.
- Thread Breaks – Bad pathing forces constant machine stops.
These issues waste time, thread, and materials—something every embroiderer wants to avoid.
Where JPG to JAN Conversion is Commonly Used
The demand for this type of file conversion spans across industries:
- Corporate Branding – Logos on uniforms, jackets, and caps.
- Team Apparel – Sports jerseys and hats.
- Promotional Items – Bags, towels, and giveaways.
- Personalized Gifts – Monograms, names, and decorative motifs.
If you’re planning to embroider designs on Janome machines, converting JPG to JAN is the first step to achieving professional-looking results.
How Much Does JPG to JAN Conversion Cost?
The cost depends on the complexity of the design. A simple text logo might be inexpensive, while a detailed logo with multiple layers and effects may require more work. However, the value is clear—one-time conversion gives you a reusable file for countless embroidery projects.
DIY vs. Professional Conversion
Some hobbyists try free software or auto-converters, but these tools rarely deliver consistent results. Auto-converted files often create random stitches without proper pathing, leading to messy outcomes. Professional digitizing, on the other hand, ensures that every stitch is carefully placed. This difference shows in the final embroidery quality.
Tips for Getting the Best Results
If you’re planning to convert a JPG to JAN:
- Provide High-Quality Artwork – The clearer your JPG, the better the digitizing outcome.
- Know Your Fabric – Different materials need different stitch densities.
- Work with Experts – A professional digitizer ensures your design looks just as good stitched as it does on-screen.
Conclusion – Make Your Embroidery Machine Work for You
Embroidery success starts with the right file format. By using JPG to JAN embroidery conversion, you ensure your Janome machine receives precise instructions for clean, professional results. Whether it’s for business branding, sports apparel, or custom gifts, having a properly digitized JAN file saves time, prevents errors, and guarantees quality. For reliable, affordable, and expert results, Digitizing Buddy is your trusted partner in embroidery file conversion.